Easy sugar-free crepes make a great base for a delicious breakfast, dinner or side dish! Make them sweet or savory depending on your toppings of choice.
This recipe was designed as a blank canvas. No vanilla, sugar or other flavoring is added to the crepes, making them to perfect vessel for any topping. Literally, anything. The sky is the limit!
A fun way to do crepes is with a crepe bar. Set out a plethora of topping items and everyone gets to make their own. Here are some ideas to set up your own crepe bar at home:
Jams, Jellies and Preserves
Peanut Butter
Cream Cheese
Butter
Brown Sugar
Powdered Sugar
Cherries and Berries
Banana
Whipped Cream
Poached Pears
Baked Apples
Cheddar, Parmesan, or Mozzarella Cheese
Ham
Prosciutto
Scrambled Eggs
Lemon Zest
Chocolate Syrup
Not your Average Crepe
Originally, I made these crepes as a featured weekend breakfast. I wanted them to be a bit heartier than your average crepe, with a secret sprinkling of protein. That’s where the almond flour comes in.
Because of the almond flour, these crepes have more of a bite than your average, tissue-paper-thin crepe. They’re more filling and naturally flavorful as well, without having an overbearing almond flavor.
Make it a Gluten-Free Crepe
To make these crepes gluten-free, swap the all-purpose flour for a gluten-free all-purpose flour.
I wouldn’t recommend making them only with almond flour, as they may come out too heavy to be enjoyable as a flexible crepe.
Layer it up
Crepes have a tendency to stick together when fresh out of the pan. Stack your finished crepes on a plate with a paper towel between each layer as you cook them. Or, use an empty sheet pan, lay the crepes out flat and use a sheet of wax paper between layers.
Swirl it Good
The secret to making crepes is all in the swirl. Hold your pan off the heat when you add the batter to the pan, and swirl as soon as you begin pouring in the batter.
Only add more batter to the pan if you absolutely cannot cover the entire surface. Otherwise, use the back of a spoon (preferably a plastic, not metal, spoon) to smooth the batter out and create one even thin layer.
Simple Sugar-Free Crepes
This basic crepe recipe is made with pantry ingredients, ready in 15 minutes and can be topped with anything your heart desires! The crepes are sugar-free, which means they can easily be made sweet or savory depending on your tastes. The almond flour makes these crepes more filling than the average crepe without weighing them down.See the recipe notes for crepe topping suggestions!
¾ to 1cupwaterstart with ¾ cup and add more as needed to thin out the batter
¼teaspoonsalt
2tablespoonsbuttermelted
Instructions
In the microwave, or on the stovetop, melt the butter. Set aside to cool.
Whisk eggs, milk, water and salt in a large mixing bowl. Add almond and all-purpose flour, then the butter. Ensure the butter has come to room temperature before adding it to the batter. Whisk until smooth.
The batter should be smooth and runny, not thick. Thinner than pancake batter. Add more water if needed.
Heat a 6" frying pan over medium high heat. Add a spot of butter to the pan if it is not nonstick.
Holding the pan at a slight angle, pour approximately ¼ cup of batter into the pan. Swirl immediately, coating the entire bottom of the pan. Use the bottom of a spoon to gently spread the crepe out if needed. Try to keep the crepe thin by spreading the batter out evenly.
Let the crepe cook for about two minutes, until the bottom is a light, golden color. Using a flat spatula, flip the crepe over to cook the other side. Typically, the second side cooks in less time than the first side.
Stack crepes on a plate with a paper towel in between each.
Serve warm. To reheat the crepes, Microwave for 30 seconds or warm in a low-heat oven.
Meal prep is growing in popularity as a method of saving money on going out, maintaining a healthy diet, or just being able to enjoy a home-cooked meal without actually having to cook the entire meal every night.
The intention of this article to shed some light on two things:
At it’s most basic, meal prep is preparing your meals ahead of time. While meal prep was initially popular as a means of maintaining a healthy diet (think weight loss/muscle building) it’s come to be so much more. Having dinner prepared (or, mostly prepared) at the end of a day’s work makes things so much easier. I enjoy the ability to eat a home-cooked meal every night, without having to make it all from scratch.
There’s two general categories of meal prep we’ll cover:
Daily Meal Prep
Batch Meal Prep
Which one you choose depends on your personal needs, including how much time you have to get dinner “on the table” every night and how much cooking you’d like to do. Meal prep can be used to create a full slate of meals for the week, including breakfast, lunch and dinner, or can be used for that one meal of the day you never seem to have enough time to make.
If you are just starting off with meal prep, I suggest picking one meal a day to prep. It’s a nice way to ease into prepping and you’ll have the opportunity to try different meal prep methods to see what works best for you.
Daily Meal Prep
Daily meal prep involves fully preparing full meals to eat throughout the week. With this, you can prepare a weekday’s worth of breakfasts, lunches and dinners ahead of time. These can be the same dish for each meal, or a variety, depending on how much you’d like to prep.
Here is an example menu for all three daily meals utilizing the same dish for each. This is a typical workweek (M-F) meal prep menu.
These are all items I’ve made and prepped for the week. I chose them because they contain ingredients and flavors that I enjoy, and because they are relatively easy to make in large batches.
The biggest advantage I found with daily meal prep was not having to think about what I was going to make for dinner, or scrounge up for lunch every day. During the workweek, my meals were covered. I had filling and delicious breakfast, lunch and dinner all planned out.
Some daily meal plans also include snacks. I keep mine simple with fruit, nuts, or chips and salsa. I’m also a big fan of popcorn, which is easy to make on a whim.
There are a TON of resources for planning meal prep, some of which I’ve included at the end of the article. Recipes made for meal prep can be particularly useful, as not all dishes hold up well over the course of a few days. They may be safe to eat, but less enjoyable or lose their texture.
Batch Meal Prepping
Batch meal prep differs from daily meal prep primarily in that it involves cooking, or at the very least, assembling meals before you eat them. This may be more suitable for someone who has the desire to cook dinner every night, but may be short on time. Meal prepping this way saves cooking time and allows you to throw together delicious, homemade meals in minutes.
Here’s an example menu, where chicken breast and ground beef were batch cooked before the workweek.
Setting aside time to wash, dice and prep vegetables for the week is also a way of batch meal prepping. This type of meal prep allows for more flexibility, as well as fresh-made meals, but does require more time and planning. To do batch meal prep well, you’ll need a plan for the week on what you’d like to make. Now, that can always change, but it’s much easier to prep when you have an idea of what you’ll be cooking for the week.
Why Meal Prep?
Have complete control over what ingredients go into the food you are eating.
For some, meal prep is a way to control what goes into their food. I’m lactose intolerant, so having prepped meals that I knew contained not one trace of dairy was a relief, and much easier on my body. If you have specific dietary needs, such as gluten intolerance or practicing veganism, meal prep can be an easy stress-free way to eat with confidence.
Meal time convenience.
With your meals already prepared, no thought is required when meal time comes. Heat up your meal (or not, if its a no-reheat meal like salad or a fun bento box) and you are ready to eat. By having a homemade, prepared option, you’re less likely to eat out, grab fast food, or even substitute a granola bar for dinner (no shame intended, but you are worth more than a granola bar!).
Saves money.
Buying groceries in bulk and preparing your own food undoubtedly saves you money, particularly if you shop what’s on sale and in season in the grocery store. Saving money on weekday cooking means more funds for weekend fun! Personally, I’d rather save during the week and go somewhere special on the weekends.
Less dishes throughout the week/on days with prepped meals.
Need I say more? Typically, I deep clean my kitchen once a week, after we’ve completed prep. All it needs is simple maintenance throughout the week to stay clean and organized.
Improve your cooking skills.
Tackle basics you’ve been wanting to learn or branch out and try something new. Additionally, meal prep will improve your budgeting and planning skills, a completely unanticipated but warmly welcomed side effect of meal prep I discovered a few months into it.
100% customizable.
It’s YOUR meal prep… make what you want to eat! Whether it’s low carb, vegan, high protein, all greens, you name it, you can prep it. There are some incredible resources available to assist with your meal prepping journey. You can choose to have meal plans created for you to follow, use a meal-planning service like Blue Apron, or do it all on your own. It’s up to you.
How does meal prep work in real life?
My husband and I both work full-time. Certainly having breakfast and lunch made work days easier, and saved us the time, effort, and money of going out to eat for lunch every day. Having dinner meal prepped allowed us the opportunity to heat and eat, and have more time to relax and enjoy each other’s company at the end of the day.
Honestly, when we first started meal prepping, I hated it. It takes a few hours on the weekend, and at first I felt I was wasting time. Despite my discontent, I increasingly appreciated being able to come home from work and have dinner ready. I didn’t have a mound of dishes in the sink, only our meal prep containers and plates to rinse and throw in the dishwasher. Eventually, I learned to love meal prep and couldn’t imagine doing it any other way.
Whichever way you choose to prep, the most important part is finding what works for you. Otherwise, you won’t be consistent about it. Whether that means carving out a few hours on a Sunday afternoon, or prepping for only three days at a time, find what works for you and run with it.
Everyone has different reasons for meal prep. For us, it was a time-saving, convenient way to enjoy homecooked meals. Additionally, it helped us save money, which we’d prefer to splurge on a nice evening out or stash away for a vacation full of fun new foods.
A note about time management
Depending on what and how much you meal prep, you may find yourself with all four burners occupied on the stove and both racks in the oven full. This can be overwhelming at first, cooking three full meals for multiple days at once.
My best advice, start slow. You’ll learn what you can do at the same time as you go, and you’ll get better at kitchen multitasking in the process. Here’s a basic method to tackle meal prep:
Dice your veggiesand measure ingredients — In the world of foodservice, this is called mise en place meaning everything in its place. Have everything ready to go, so that once you start cooking, its a seamless process of adding ingredients. This way you won’t be rushed to chop an onion when you’re pot of water is boiling and the chicken is ready to be taken out of the oven. It can get hectic, fast.
Start with the oven — Once your ingredients are ready, start with the recipes to be made in the oven. Whether it’s roasted veggies, or a sheet pan pork chop, get the oven heated and get those things in there first. Oven recipes are great for meal prep, because once their in there, the oven does all the work.
Move to the stove — While your food bakes away in the oven, turn your attention to the stovetop. Start anything you’ll be cooking and keep a close eye on it. In the meantime, clear counter space to place those hot pans once they’re ready to come out of the oven.
Let everything cool — Don’t store your food as soon as its done cooking. In accordance with food safety measures, it’s best practice to allow hot food to come to room temperature before placing it in the refrigerator. Otherwise, it may cool down unevenly and even leave food susceptible to spoilage. No one wants that. While everything cools, set out your containers.
Fill and store — Once everything is cool, fill up your containers and stick them in the fridge. For no heat meals like salads, keep dressing separate and items that may cause the lettuce to get soggy, like tomatoes or cucumbers.
Frequently Asked Questions
Q: Don’t you get tired of having the same thing every day?
A: The honest answer is… sometimes! When we make something I don’t like that much, or that didn’t turn out as I had expected, it gets tiresome to eat it day after day.
But when we make dishes I truly enjoy eating, that are filling and tasty and cooked to my preference, I do not tire of eating it throughout the week. Make no mistake — I greatly look forward to the weekends, but I’d much prefer eating the same dinner five days a week without the stress of whipping up a healthy meal after a full work day. Chicken Enchiladas and the Lemon Miso Pork with Coconut Curry Vegetables were two meal preps I 100% looked forward to eating every single day. As I said before, it’s imperative to find what works for you and to start with flavors and dishes you already know you love!
Q: Can you ever eat out? Aren’t you committed to eating what you prep?
A: Yes, you can eat out and no, you aren’t obligated to eat what you prep for every meal. The flexibility of your meal prep depends on your own personal preference. I’d rather make meals for the week and have that option. When plans change, or the opportunity arises to eat out, or with friends/family, it is simple enough to put the planned, prepped meal into the freezer to eat at a later date. By doing this, you’ll eventually build up enough meals to eat for a week without prepping! Believe me, it happens faster than you’d think.
Q: Does all of your prep really keep for five days?
A: It depends. Some ingredients hold up much better than others. An easy way to think about it: any food that would hold up to a trip to the beach, or a picnic is a great candidate for meal prep. There are also ways to preserve your food, like dressing salads only right before you eat them.
Foods that, once cooked, get mushy or undesirable in a day are not recommended for meal prep — my number one example: zucchini! Additionally, if you are concerned about the freshness of your food, you can prep for three days a time only, instead of the full five.
Ultimately, start small to learn what you are comfortable with. We’ve prepped this way for over a year and have never had issues with food going bad. There were some things that just weren’t tasty after a day, but those were experimental and things we won’t do again. Okay, so it was the one time I tried making roasted radishes. The internet made it look tasty but I do not recommend. Ever.
Meal Prep Resources
Workweek Lunch
My all-time favorite meal prep resource. Talia, founder of Workweek Lunch, provides kitchen-tested meal prep recipes, sized and ready for you to cook. The website is full of free recipes, but to unlock all of the meal prep potential, including weekly meal plans complete with recipes and a shopping list, a subscription is required. I’d recommend starting with the free recipes if you’re new to prepping and consider a subscription if you’re having difficulty planning what to make each week.
Budget Bytes
Budget Bytes has an entire section on their website dedicated to meal prep recipes. Beth, founder of Budget Bytes, creates tasty recipes on a budget that don’t compromise nutrition or flavor.
Yep, that’s me! I have a growing collection of meal prep recipes available on the website, as well as an ongoing series of posts about meal prep (including this one). I also have two different meal planning templates available as free downloads on the Free Resources page.
Do you meal prep? If not, is it something you’re interested in? Let me know in the comments below.
What’s the difference between drinking fresh fruit/vegetable juice and making a smoothie? Juicing extracts the nutrient-rich juices from your fruits and veggies. Smoothies consist of pureed fruits (and sometimes veggies). Meaning the main difference is that in a smoothie, you retain the natural fiber in the fruit/vegetable pulp.
Juices are less filling than a smoothie, but provide more concentrated nutrients and benefits, since you are eliminating all of the fruit/vegetable mass and just consuming its rich nutrient juice.
Both are great options, and it truly depends on your preference. Smoothies can be a quick way to get your fruits and veggies and add other nutrients like a protein powder, super greens powder, or nut butters for natural protein and fats.
Disclaimer: Edible Ink does not endorse any kind of “juice diet” or “juice cleanse”. Juicing should be a part of a balanced diet, an addition to your lifestyle, not a meal replacement. Always consult a nutritionist or your doctor before doing any kind of “cleanse” or “diet”.
Juicing with a Blender
This method of juicing requires a few kitchen gadgets you probably already have in your kitchen:
Standard blender, NutriBullet or similar blending vessel
Fruit(s) and/or vegetable(s) of choice
Square of cheesecloth
Nice glass bowl
Handy funnel
A jar or container in which to store your juice.
The process is simple. Add your washed and coarsely chopped fruits/veggies to your blender. If necessary, add a few tablespoons of water to help everything blend smoothly. Once blended, strain out the pulp using a cheesecloth over a glass bowl. Squeeze out all the excess juice from the cheesecloth, then use the funnel to safely transfer your fresh juice to your desired storage container. Mason jars work great for this!
To enjoy your fresh juice all week, make a large batch on the weekend. Store in the fridge and enjoy throughout the week.
A quick look at the blender juicing method. Here I made fresh beet juice.
No Waste Juicing
The process of juicing is aimed to extract the juice from your fruits or vegetables, leaving a lot of pulp (mass) behind. In order to make your juicing zero waste, save the pulp and reuse it!
To store your fruit/vegetable pulp, grab a reusable ice tray. Pack the pulp into the ice cube wells and freeze. Once frozen, add to a storage container of your choosing and keep in the freezer until ready to use. This ensures that the pulp is in small individual sizes, instead of one block of frozen pulp.
When you’re ready to make a soup or some vegetable stock, pop in a few of your vegetable pulp cubes. Or, for your next smoothie, add a few cubes of fruit pulp. No waste!
Add your vegetable pulp to your next pot of veggie broth!
How to Juice without a Juicer (Blender Method)
use your blender to makes fresh "pressed" juice. No special equipment needed!
Standard blender, NutriBullet or similar blending vessel
Fruit(s) and/or vegetable(s) of choice
Square of cheesecloth
Nice glass bowl
Handy funnel
A jar or container in which to store your juice
Ingredients
Fruits or veggies of your choosing
Water to blend
Instructions
Select your fruits and/or veggies. Wash and dry them. Cut out the core/seeds any parts you do not want in your juice. Then dice. For harder vegetables such as beets, you’ll want to help your blender out by cutting them smaller. Fruits tend to blend easier, and may not need to be cut as much as vegetables.If you'd like to create a juice blend, for example, orange carrot, you can add them to the blender at the same time.
Add a splash of water. Depending on the tenacity of your blender, it may be able to handle the fruits or vegetables without any additional liquid. For example, a Ninja blender may be able to handle this.Having a Nutri Bullet, I know that I do have to add water or it won’t blend. A few tablespoons should work just fine.
Blend until smooth.
Place the cheesecloth over the glass bowl. This will serve to catch any pulp or mass in your juice. I recommend cutting the cheesecloth with overhang on the bowl, so it is easier to pick up and ring out. Carefully pour the entire contents of the blender through the cheesecloth.
Gently lift the cheesecloth from the bowl by bringing all the sides together to form a seal. Squeeze the pulp in the cheesecloth to remove any remaining juice. Your bowl should now be full of delicious fresh juice!
Notes
Save the pulp! Pulp can be frozen and used in smoothies, soups or stocks. For easy handling, pack pulp into an empty ice cube tray.When frozen solid, remove from tray and store in freezer-safe packaging until ready to use. No waste!
Keyword How to juice at home, How to juice without a juicer, Juicing, Juicing at home, Smoothie
This recipe is geared toward the use of an Instant Pot. However, you can make dried beans on the stove as well (soaking will speed up this process).
As meal prep became more of a fixture in my life, I began looking for ways to cook things economically and in large batches. Enter dried beans. Never before had I bought dried beans or thought twice passing them up in the grocery store. Armed with my Instant Pot, I scoured the internet for an easy, fool-proof way to turn dried beans into a delicious component of our weekly meals.
My favorites are black beans, chickpeas and recently, pinto beans. In a pinch, anything available at the store will do.
Typically, I cook the beans as directed below. I remove the beans from the instant pot, making sure to save the “bean juice” for later. It makes a great base for soups and stocks. (Throw your veggie scraps in the Instant Pot with the bean juice, a sprinkle of salt, bay leaves, and enough water to cover, pressure cook on high for 60 minutes, vent, pull out the scraps and voila ready to use stock.)
I like to fry up the cooked beans in my cast iron skillet with some EVOO and spices. They get a crispier exterior and an extra boost of flavor. Yum.
How to Cook Dried Beans in an Instant Pot
Easily cook dried beans without prior soaking by using an Instant Pot.
1tbdried herbs of choice (bay leaves, basil, oregano, etc.)
3clovespeeled garlic (or ½ an onion)
2tspsalt
½tspapple cider vinegar
Instructions
Rinse beans under cold water.
Add beans, water, herbs and garlic or onion to the Instant Pot.
Place lid and ensure valve is set to sealing.
Cook on High Pressure for the following times:- Mung Beans: 6 minutes- Pinto Beans: 25 minutes- Navy Beans: 30 minutes- Black Beans: 30 minutes- Great Northern Bean: 35 minutes- Kidney Beans: 35 minutes- Garbanzo/Chickpea: 40 minutes
Allow natural release until pressure subsides and pin drops OR let rest for 20 minutes before quick release.
Stir in salt and apple cider vinegar. The salt adds flavor. Apple cider vinegar helps to neutralize gas that often comes with eating beans.
Using a slotted spoon, remove beans from Instant Pot. Reserve some liquid for storing the beans. You can also use the bean liquid as a base for vegetable broth, stock or soups. Allow the beans to cool completely before storing.
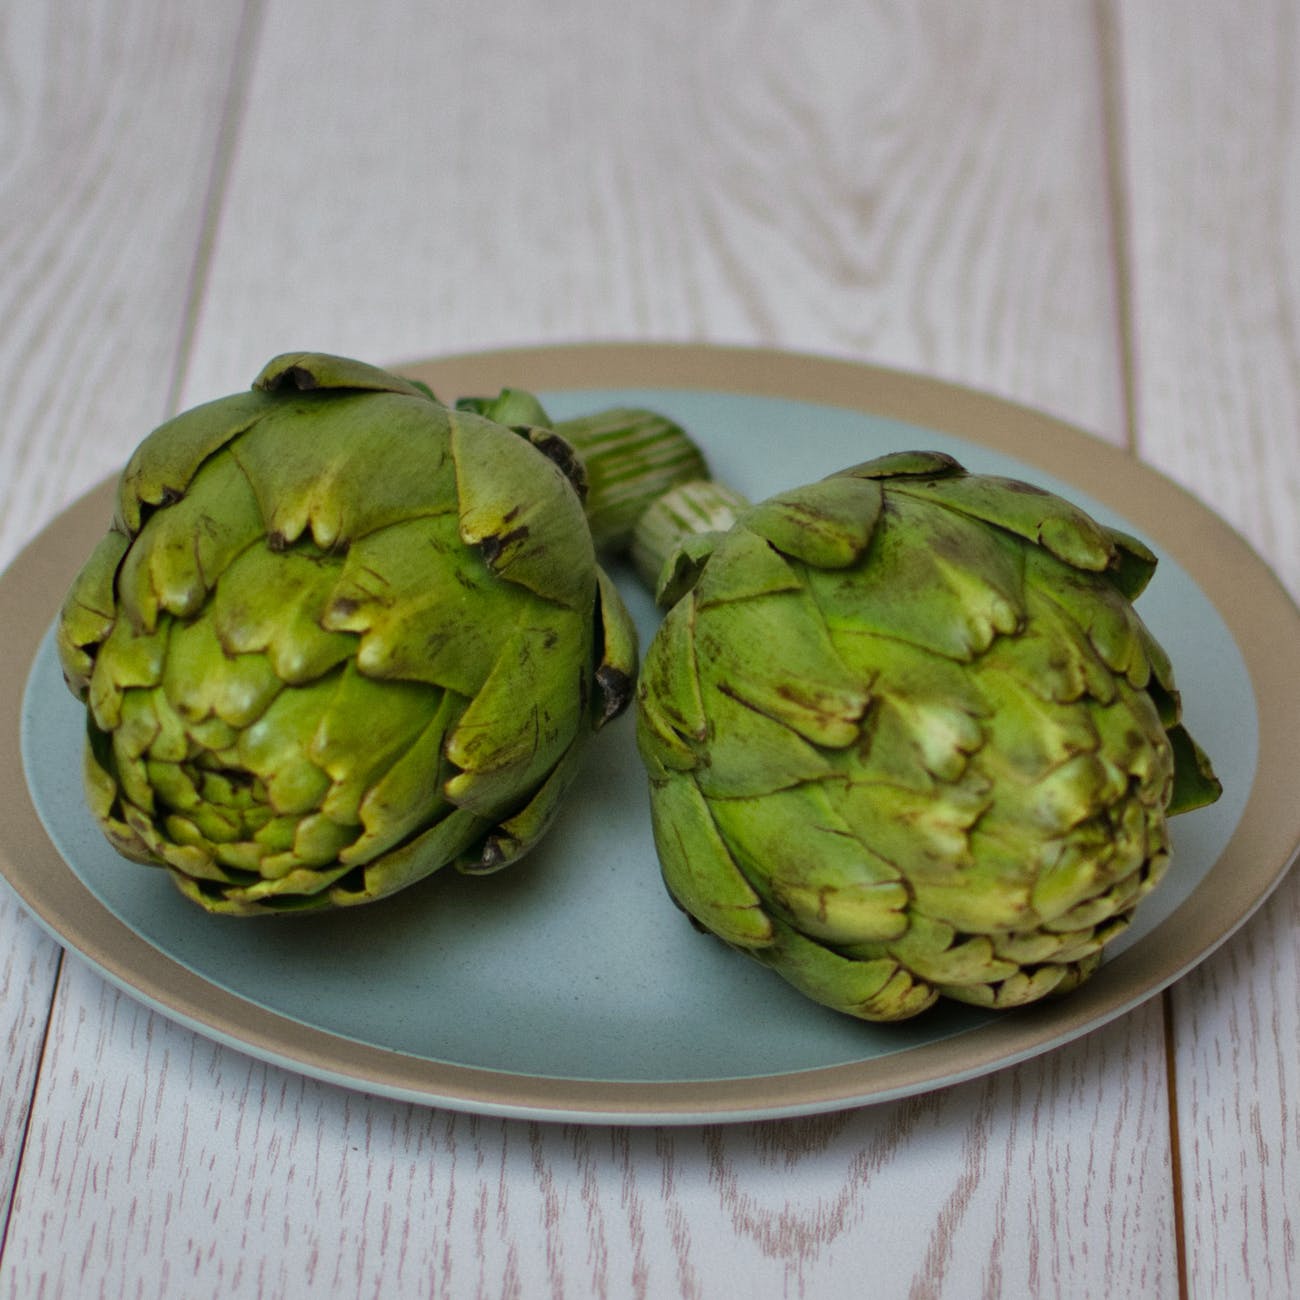
Artichokes! With this easy-to-follow steam and spices recipe for preparing artichokes, I hope you’ll reconsider these hearty flowers not as intimidating to cook, but as an accessible side dish for any entree.
I may be biased — I grew up eating artichokes — but I consider artichokes one of the tastiest vegetables. Of course, the Garlic Butter Aioli dipping sauce may have a lot to do with that!
My preferred artichoke, available locally, are the Lyon artichokes, which are in a league of their own compared to regular grocery store artichokes. The Lyon artichokes tend to have more meat on them, making them 100% worth the effort. Typically, we enjoy them for dinner with sausages or chicken and another simple side dish, such as mashed potatoes. If you can’t find the coveted Lyon artichoke, other varieties work perfect in this recipe and will still be tasty.
Send me a note with any questions about the recipe or how to eat artichokes (the heart is the best part!).
YOU’LL NEED:
2 whole artichokes.*
1/2 tsp salt.
1 tsp Italian Seasoning.
1/2 tsp garlic powder.
1/2 tsp onion powder.
1 tsp paprika.
1 tsp black pepper.
Garlic Butter Aioli:
1/4 cup (1/2 stick) unsalted butter.
1 tsp garlic powder.
2 tablespoon mayonnaise (more or less to taste).
WHAT TO DO:
1. Cut the stems off the bottom of the artichokes. Turn them over. Using kitchen shears, trim the spiny leaves by cutting off the tips only, less than a fingertip in length.
2. Using a wide pot big enough to fit both artichokes stem side up, add the seasonings. Place the artichokes stem side up over the seasonings and fill the pot with water until the artichokes are covered about halfway. A drizzle of Olive Oil in the pot is also recommended, but not required.
3. Place on pot on the stove with lid. Turn the stove to medium high heat, bringing the water to a boil. Once boiling, turn down just a touch and set timer for 45 minutes. Check periodically to make sure the water isn’t boiling over or has evaporated too much. The artichokes should remain half submerged in water for the duration of the cooking process. If the water has evaporated too much, add some more. Keep the lid on the pot while cooking, this is what builds up the steam that cooks the artichokes.
4. About 10 minutes before artichoke are finished cooking, make the dip. Melt the butter. Once melted, whisk in garlic powder and mayonnaise to taste. Whisk vigorously to emulsify mayo and butter. For a low fat serving option, try eating plain or with olive oil.
5. Artichokes are done when tender when pierced with fork. Remove from water and place face down on plate to drain. Once cooled a bit, turn face up. Remove leaves one a time to eat, dipping in Aioli as desired. To access the artichoke heart, eat (or remove) all leaves, exposing the inside. Here you’ll find spiky hair-like area. Remove all the hair. Do not eat, as it can cause irritation and choking. Once all spiky hair is removed, you can eat the heart! Dipping heart in Aioli is highly recommended.
Recipe Notes:
*This recipe is intended to serve two people, eating one whole artichoke each. Adjust the recipe as necessary for your household. If you haven’t eaten many artichokes, make one to share by cutting the rest of the ingredients in the recipe in half.